Posts

Showing posts with the label Stampin Up!

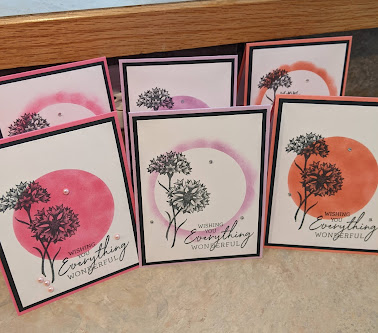
Watercolor Mother's Day Card

Image
  I wanted to use the CTMH Finding Beauty set. I liked how these stamps had a watercolor effect to them. I used my new So Swirly embossing folder to give the Polished Pink CS some texture. Then used Pear Pizzazz as the accent color. The Mother's Day sentiment is from SU Daffodil Daydream. 

Floral Blue Birthday

Image
  I used the Friendly Hello stamp set from Stampin' Up! I wasn't quite sure what to do with it, so I followed the Mystery Stamping on YouTube to get some inspiration. I think it turned out great!

Bright Floral Card

Image
  I used some random paper I had to make this card. I found Balmy Blue and Fresh Freesia coordinated with some of the flowers in the paper and used those for the accent colors, as well as black. The Celebrate stamp was from a very old Stampin Up set. I think they turned out fun!

Accordion Fold Fishing Card

Image
 I found this card on Pinterest that I thought would be fun to recreate, but it didn't have any information on how to make it, so I got to figure it out for myself! Here are the details: 1. Cut Crumb Cake to 5 1/2 x 8 1/2. Score and fold at 4 1/4. 2. I used some old CTMH paper, Indian Corn Blue, for the next layer. Cut to 5 1/4 x 12. Score at 4, 6 1/2, 9, and 10 1/2. Fold accordion style. 3. I embossed the smallest fold with the tree bark embossing folder. 4. Layer the other two panels, 3 3/4 x 5 and 2 1/4 x 5.  5. Stamp and cut images. Adhere to front as desired. I really liked the style of this stamp set. It was fun to work with!

Large Floral Blues and Greens Card

Image
  I loved this layout I found on Pinterest and copied it, except changed out the sentiment. I was able to make 9 cards with one sheet of DSP! 

Happiest of Birthdays Card

Image
 I wanted to use some random vellum I had. I found some CS that worked well with the colors in the vellum. It was nice because the CS didn't have to match perfectly- it's actually better that it didn't so all the colors would show through!  Colored Cardstock: 5 1/4 x 4 Vellum: 5 x 3 3/4 Then I attached ribbon to the front of the card and added the sentiment from the Charming Sentiments stamp set and some die cut candles from the Charming Sentiments dies.  It turned out to be a cute, easy card!

Elegant Flowers Birthday Card

Image
 I saw a beautiful card on Pinterest and wanted to recreate it. There weren't many details on how to make it, but I figured it out! I used the Dainty Flowers stamp set, and then cut the silver and white with the Basic Borders die. I used four colors: Poppy Parade, Polished Pink, Flirty Flamingo, and Old Olive. It was challenging to get the two triangle pieces at the same center point and angle. I tried to compensate by measuring to the exact middle of the long edge and then making sure the center of the V was at that point. I just eyeballed the angle. Even though they aren't perfect, they still look great! 

Play Birthday

Image
 I haven't been feeling well, so this week I kept it simple and used some patterned paper I've had forever to make these cute birthday cards. I used an old Stampin' Up! sentiment stamp (on wood, even!) and added some Basic Matte Dots for visual interest. It was a quick and easy project!

Unique Carrots card

Image
 I got this set because I saw some cute cards using it, but then afterwards wasn't sure what I would use it for. I finally used it for the first time and thought these cards turned out cute! I got the idea on pinterest from this pin. Colors: Mango Melody, Rich Razzleberry, Pear Pizzazz Stamp set: SU Thanks a Bunch! I stamped the small bunch of carrots on a 4" x 5 1/4" piece of white cardstock in the two colors. Then I stamped and cut out a large carrot in the Rich Razzleberry. Then I used the largest die from the Deckled Rectangles die set to cut out a piece of vellum. I added some embellishments to give it a finished look.

Dainty Flowers sympathy

Image
 Unfortunately I needed a sympathy card for some friends whose son tragically passed away. I cased this card I found on Pinterest and used the sentiments from the Timeless Tulips set. I think I like my version better than the one on Pinterest, but I did think it would be better with the three panels slightly wider, so there isn't so much space between them. But all in all, a good, quick sympathy card!

Treetop Birthday Card

Image
 I needed a masculine birthday card, and I found this card on Pinterest that I decided to copy. I used the Beauty of Friendship DSP and stamp set on the inside of the card. The Happy Birthday on the front is from the Biggest Wish stamp set.

Little Bird Told Me Card

Image
 I cased a card I found on Pinterest to create this card. I like how it turned out so I can use it for a birthday, a baby, or something else! On the front it says "A little bird told me..." and then inside it says, "You've got something to celebrate!"  I used the Wonderful World DSP to create a fun background, and then used Rich Razzleberry for the bird and the flowers. 

Divided Tulips

Image
  I saw this card template on Mystery Monday Stamping . I liked the idea, but switched out a stamped image using SU Timeless Tulips for the DSP. I used Polished Pink and Mint Macaron for my ink and paper choices. I needed a good Mother's Day card and I think it turned out perfect!

Black Floral Stripe card

Image
 I got the inspiration for this card from a YouTube video by Sue Stampfield. It is a great way to use up scraps and the black makes the floral image pop! 1. Cut black cardstock to 11 x 4 1/4. Score at 5 1/2. 2. Cut black cardstock to 4 x 5 1/4 and emboss. Attach to the front of the card. 3. Cut DSP to 1 1/2 x 4. 4. Cut coordinating cardstock to 1 3/4 x 4. Attach the DSP and then use dimensionals to attach to the card front. 5. Using scraps, stamp the sentiment, punch it out and attach to coordinating cardstock. 6. Cut out white or vanilla cardstock for the inside of the card, 4 x 5 1/4. Stamp as desired and attach. 7. Embellish as desired.

Crayon Birthday Fun Fold

Image
 I wanted to use up some random envelopes with this card. So I measured the envelope, subtracted a quarter inch from each side, and that is the size of the face of the card.  This fun fold opens only in the middle, so I made the middle one half the size of the card face and each strip of patterned paper one quarter of the card face (minus one fourth inch to give the border). The patterned paper is just random paper from my stash.  I cut white cardstock for the inside middle and the outside middle.  The front piece of white I embossed with SU birthday greetings embossing folder.  Then I stamped the crayon from School Days from CTMH and cut them out. I adhered them with dimensionals.  The red gems are from the dollar store.  Easy but fun!

Circle Masking Technique

Image
 I had a lot of fun with this new technique! I saw this on Sharon's Mystery Stamping and knew I needed to try it. It was actually quite easy, and I think it creates some stunning cards! 1. Cut colored cardstock to 4 1/4 x 11. Score at 5 1/2. 2. Cut black cardstock to 4 x 5 1/4. 3. Cut white cardstock to 3 3/4 x 5. 4. Cut white cardstock to 4 x 5 1/4 (for the inside). 5. Die cut or punch a large circle out of a post it note or piece of printer paper. I think using the sticky note would be ideal because then it will stick in place while you are working with it! 6. Center the paper with the circle cut out of it (negative image) on the 3 3/4 x 5 cardstock. Using a sponge, daubers, or other sponge-type applicator, gently fill in the circle with ink that matches your colored cardstock.  7. Using black ink, stamp a solid color image and sentiment on the card.  8. Add embellishments as desired. 9. Stamp a sentiment on the inside white piece and attach to the inside of the card.

Wedding Cake Card

Image
  For this card, I used the CTMH set Now and Forever. I made the card mainly white, with added texture from the SU Quatrefoil Tile embossing folder. I did color in a few flowers and greenery on the cake to give it a little visual interest, and also added Touch of Stella to the sashes on the cake. I matted the image with a narrow black mat, and then used some silver cardstock I had in my stash for a wider mat. I added ribbon to the bottom to give it a finished look.

Hello Ladybug Fun Fold

Image
 For this card, I used the Hello Ladybug stamp set and punch from Stampin' Up! I used this blog post as a template for this card. For papers, I used Real Red as the card base, Basic Black for layering, DSP from the Daffodil Daydream pack, and Very Vanilla cardstock. For the green, I used Mossy Meadow. All Stampin' Up! products. The red gems were a dollar store find!

Daffodil Daydream Double Easel Card

Image
 I created these cards using Stampin' Up!'s Daffodil Delight DSP, stamps, and dies.  I used this blog  as inspiration for this card. To create: Very Vanilla cardstock at 4 1/4 x 11, scored at 5 1/2. Colored cardstock 4 x 10 1/4, scored at 2 1/2 in and 5 in. Fold to create the easel shape. Attach the colored cardstock to the Very Vanilla. Cut coordinating DSP to 3 3/4 x 3 and 3 3/4 x 2 1/4. Attach on appropriate sides. Stamp and die cut image of single daffodil. Color. attach to front easel panel with dimensionals. Attach a ribbon and gems as desired. I created these as anniversary cards, so I stamped a Happy Anniversary sentiment as well as a black image of the daffodil to the inside of the card.